
Our Hawaii Fixer Upper, Project #2: The Guest Bathroom
Our second renovation project is the guest bathroom. This is a small, but not tiny, bathroom that is next to the guest bedroom that we previously updated. We have guests coming to stay with us on May 31 so we had a limited time to get everything done. And believe me when I tell you that this was pretty much a gut job. There was almost nothing that we would keep from the original bathroom.
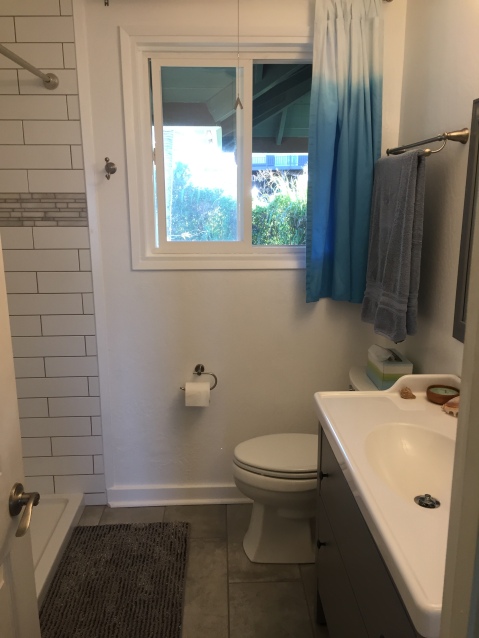
First a few “before” pics of the bathroom in its former, uh, glory.
 Sorry for the bad angle on the shower. The enclosure was corroded and the walls were Corian sheets that were just glued to the wall. Not really watertight.
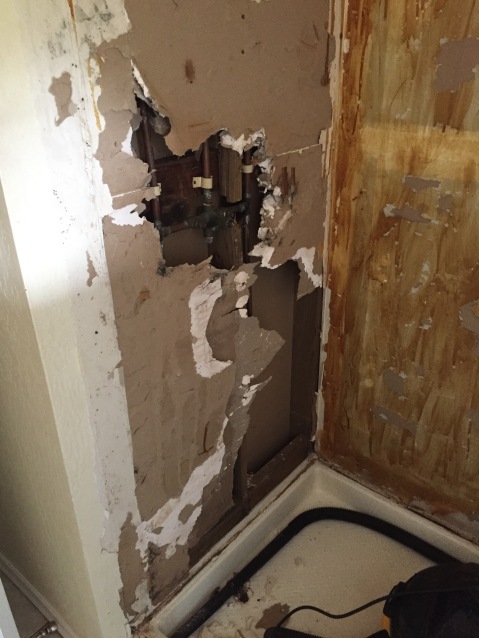
 The cabinet for the sink was full of water damage and had been harboring mice at one time. Note the position of the outlet on the wall. Not even enough room for a full sized wall plate.
 If you look at the base of the toilet you can see way too much caulk that was used to mask the cracks in the tile. The tiles were cracked because the subfloor underneath was rotten from water damage. The picture doesn’t do justice to how tilted the toilet was because of the failing floor. I’m just glad no one fell through!
 At least the window was OK. 😊
Demolition
So the demolition began… everything came out. We took the shower area down to the studs, removed the cracked and degrading shower pan and removed the old tile which had cracked in many places. Essentially stripped the place down.
The Shower Area
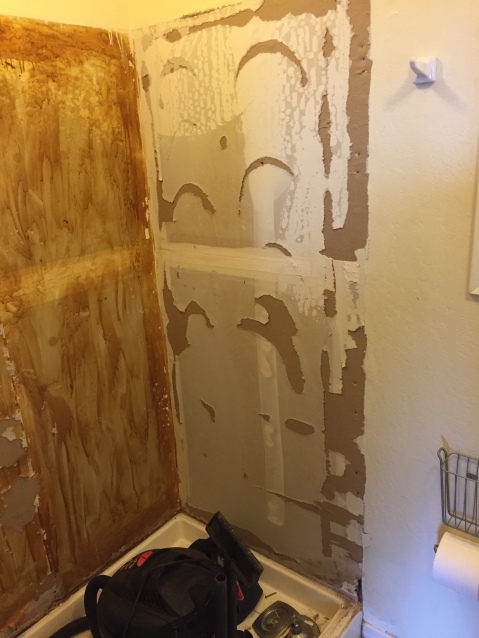
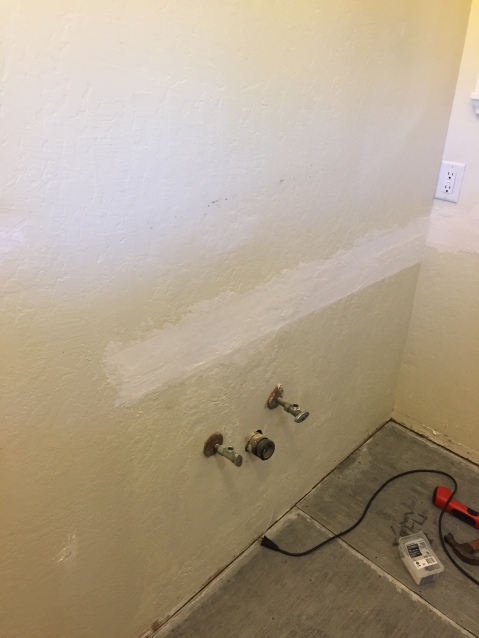
This is after we removed the Corian sheets from the wall. They had just been glued over regular drywall – and not very well. I was able to pull the pieces down by hand. They peeled right off. At the bottom right you can see that the drywall had degenerated from water damage. It was very soft at the bottom. This damage extended to the floor underneath the tile and shower pan.
Yes, ugly like the other side!
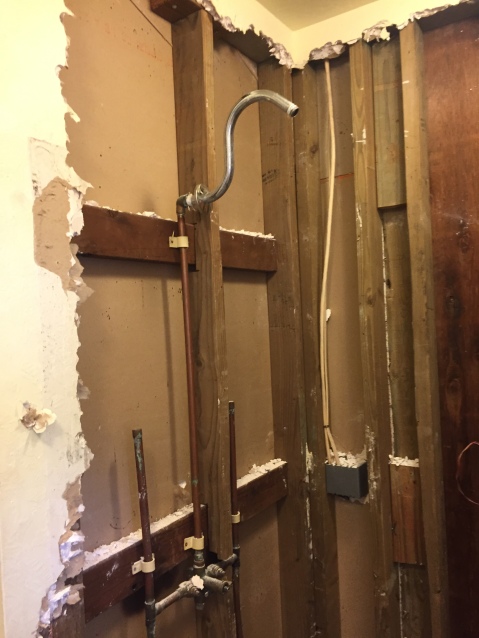
Surprisingly, there was not as much water damage behind the drywall as we thought there might be. The wood was solid and not soft at all.
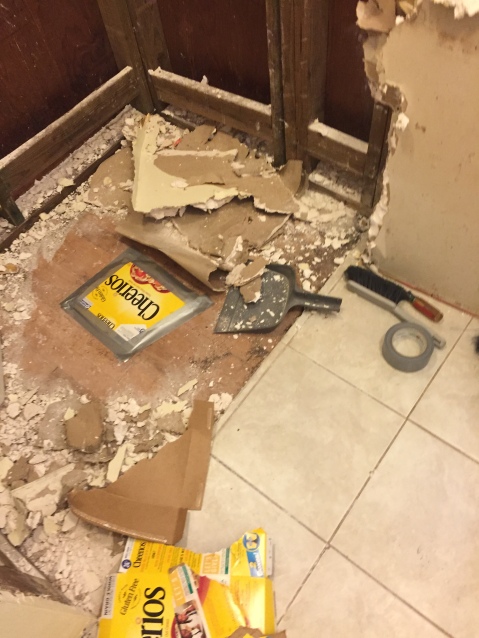
The shower pan is out. The flooring is 3/4 inch oak, which is used as both the floor and sub-floor in this 1979 house. At the corners where the shower pan ended, the floor had rotted almost all the way through from water damage.
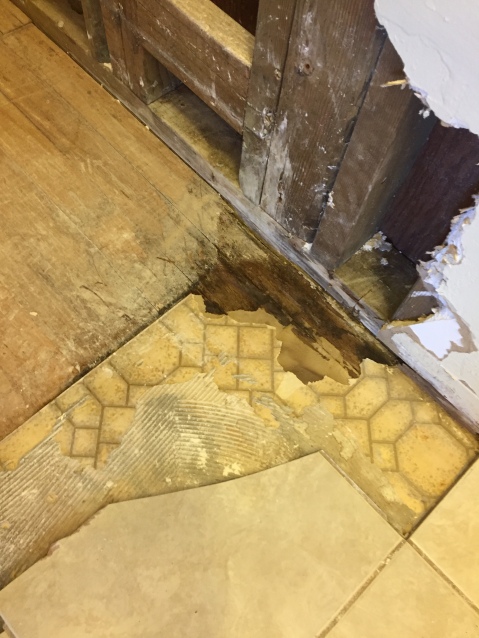
It doesn’t look that bad here, but when we started scraping away the discolored wood on the floor it went almost all the way through. You can also see that the tile was laid directly over the old linoleum.
The Toilet Area
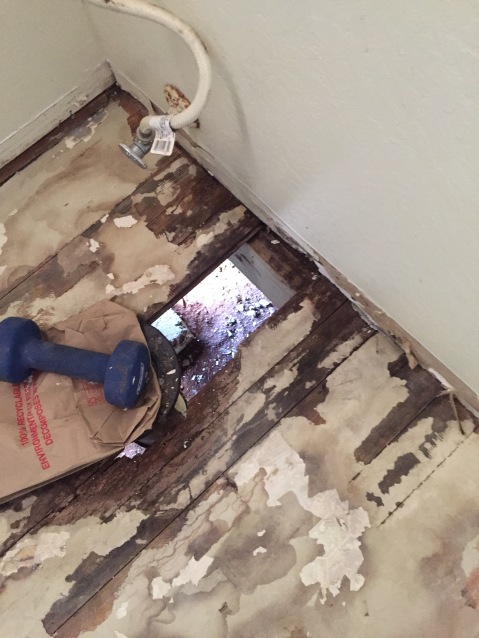
Under the toilet we also found water damage. Prior to the demo the toilet leaned to one side and the tile on that side was cracked due to a soft floor underneath. There must have been water leakage going on for a LONG time to damage it that much.
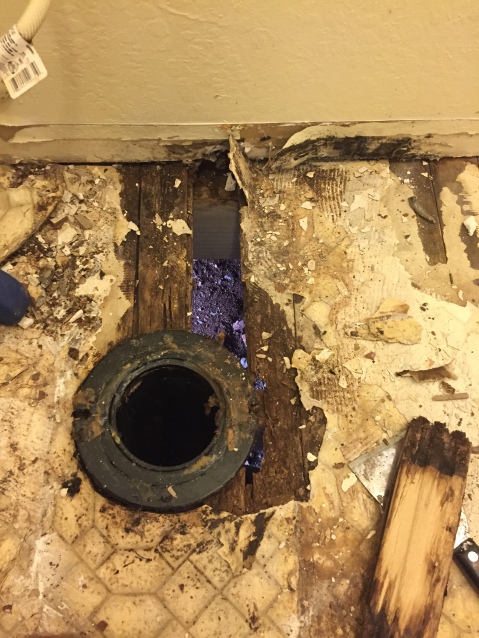
Yeah, not a pretty sight. You can see through the floor to the ground where I pulled out the loose, dry-rotted flooring. All of the flooring in the immediate area around the toilet ring was badly damaged.
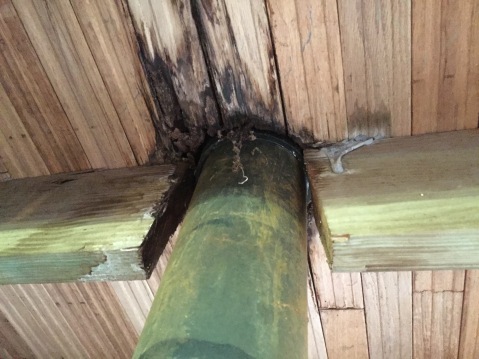
This is a view from underneath before we started the demolition you can see where the dry-rot had gone all the way through all around the drain. Another fun fact: When they installed the drain they cut right through the joist and never bothered to support it anywhere. I believe this was the reason for the floor bowing so much and the tiles cracking in this area. Too much flex.
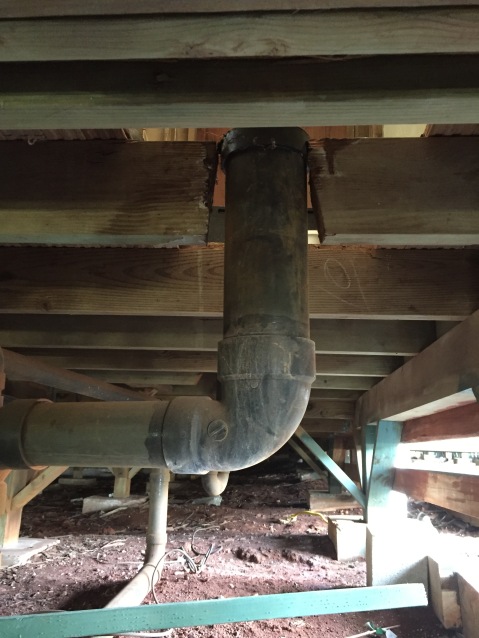
Yeah – just kind of hanging out there in space!
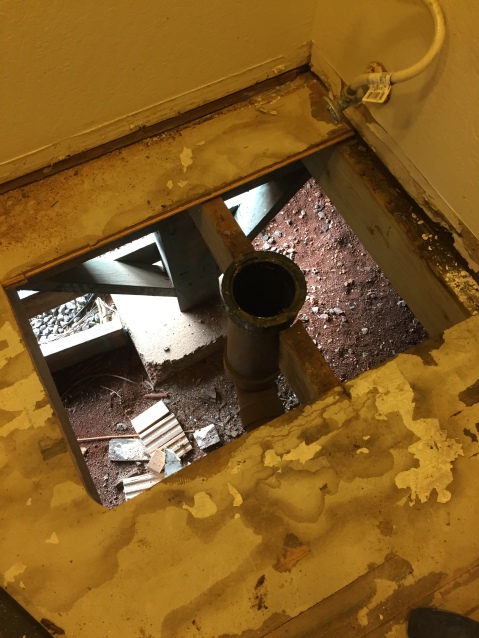
We cut out a large area around the drain to make sure all the bad wood was removed, and to allow us to access two more joists in order to support the 3/4″ plywood we were going to patch the floor with.
The Sink Area
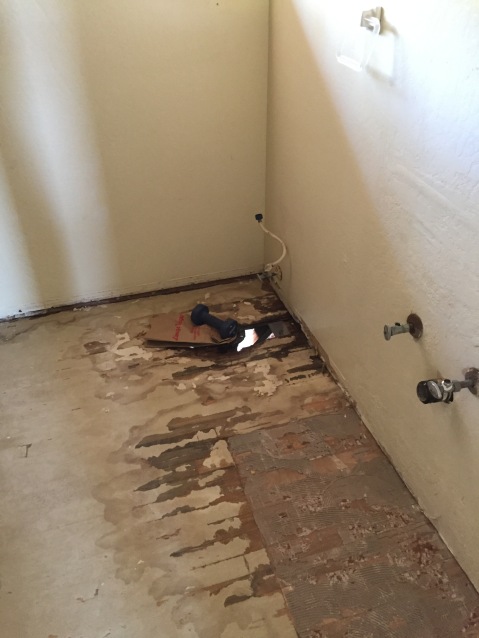
The sink/cabinet was a Home Depot unit that was in reasonable condition from the outside. But the construction is mostly particle board which has a short shelf life here in Hawaii. Once moisture gets into particle board it starts to expand and come apart and this cabinet was doing all of that. It had to go.
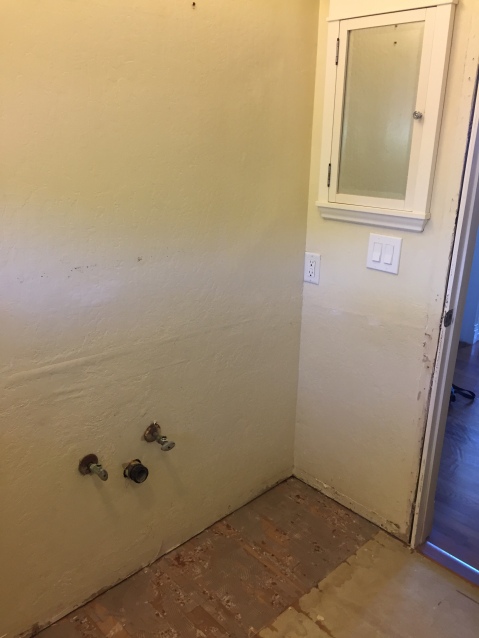
You can see the wall had some raised spots behind where the cabinet sat. We found that, for some unknown reason, there were cardboard shims stuck on to the drywall there and then covered over with joint compound. Its still a mystery to me. You can also see that the linoleum did not continue under the cabinet and the tile had been glued directly to the oak floor. Removing the mortar from that area was not fun, but we wanted a nice flat surface before we started installing the floor. We also had remove all the baseboard and the trim around the door.
Rehabilitation
Prep work: Now that we had all the bad crap out, it was time to start prepping the area. We had to patch the floor around the toilet drain and install cement board on the floor and in the shower stall.
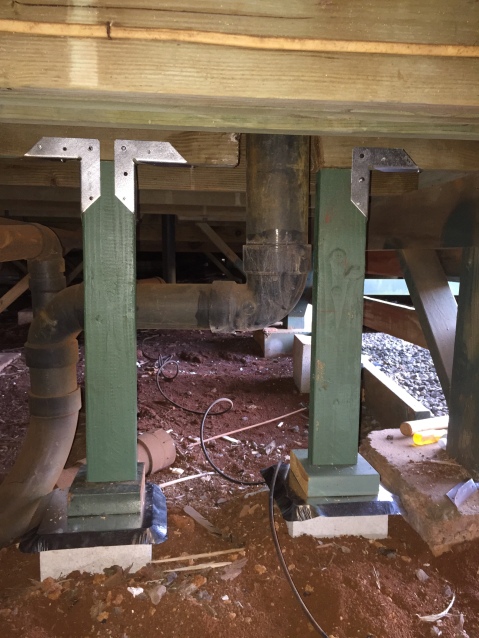
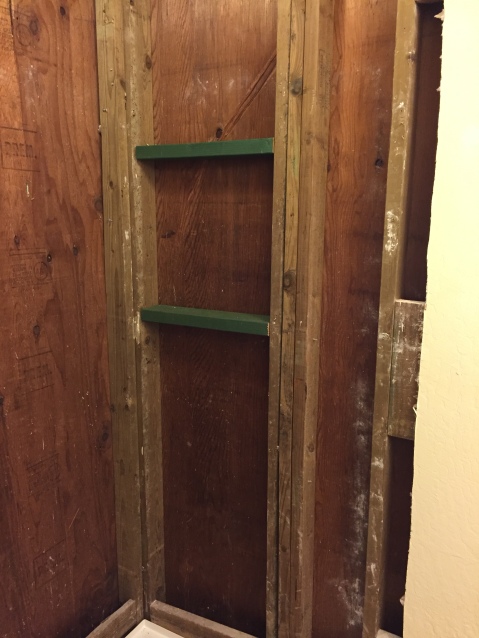
First, we wanted to support the joist where it had been cut to accommodate the toilet drain. I used some 2 x 4’s nailed to a wood base to give them better stability and supported those with cement block and termite barrier.
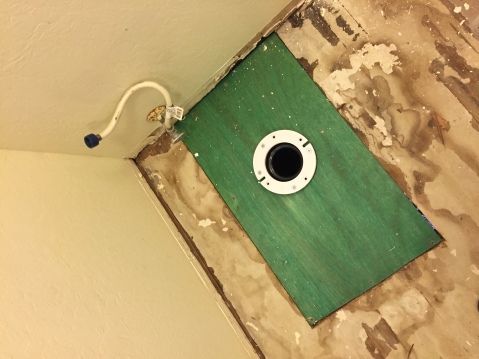
Here is the 3/4″ plywood patch that we applied. the wood is green because I treated it with termiticide before installing. Also a brand new toilet ring/extender was installed.
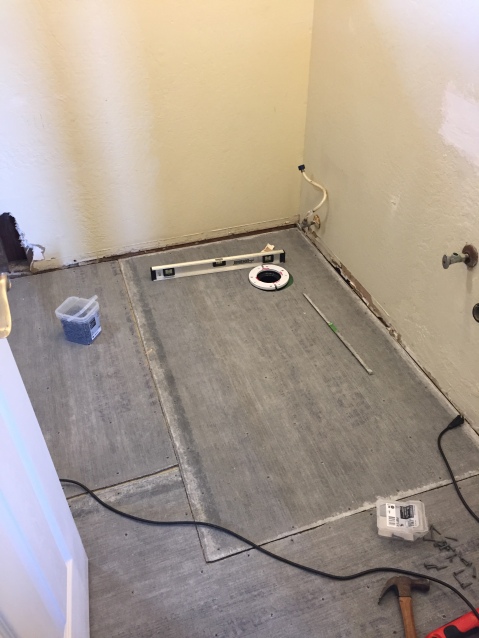
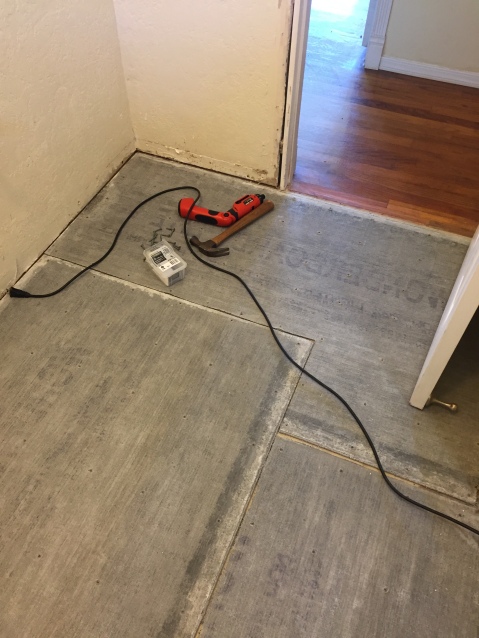
Next the cement board went down for the flooring. We used 1/4″ Wonderboard Lite for the floor. This would keep the floor from flexing and cracking the tiles that we would later install.
Here is where we had torn off the shims that had been stuck to the wall. We spackled and textured the area to improve its uniformity with the rest of the wall.
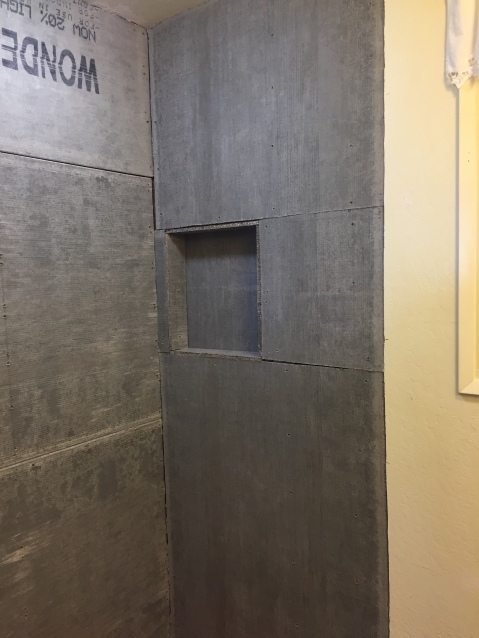
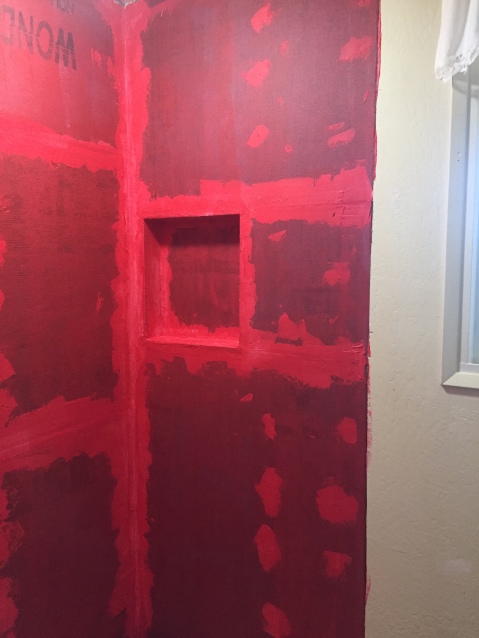
We framed out an insert for shower goodies.
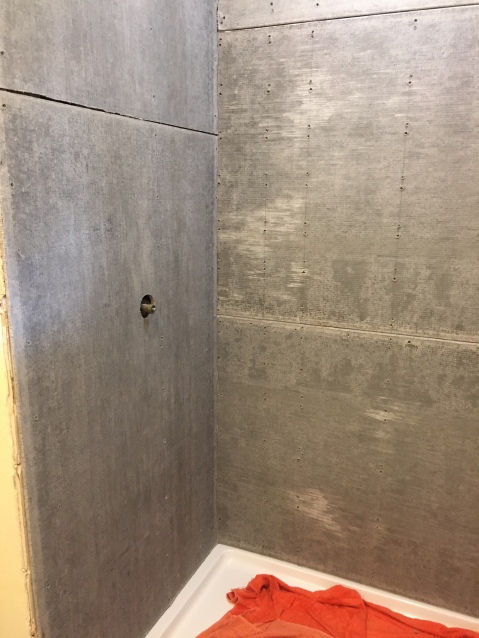
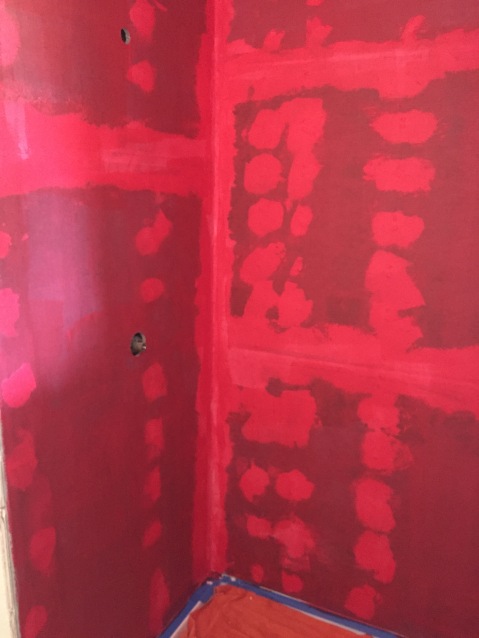
After mortaring the joints we applied RedGard as a moisture membrane to keep the shower water tight. You just roll it on like paint. Pretty cool stuff!
Unfortunately all the demo and prep work was not as easy as it sounds. It was grueling work to get it to this point. There were other tasks that I didn’t get pics of – like relocating the power outlet and rewiring the light in the shower, etc. But now we were finally ready to start the finish work….
The Finish Work
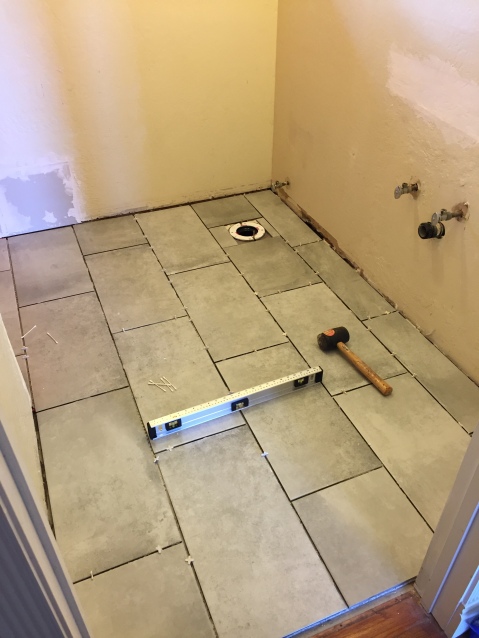
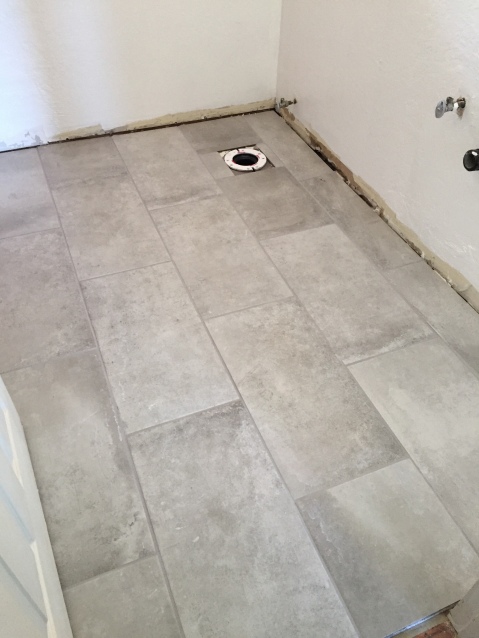
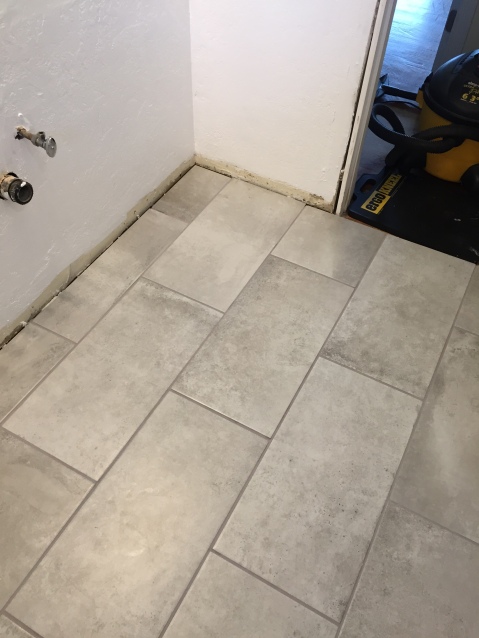
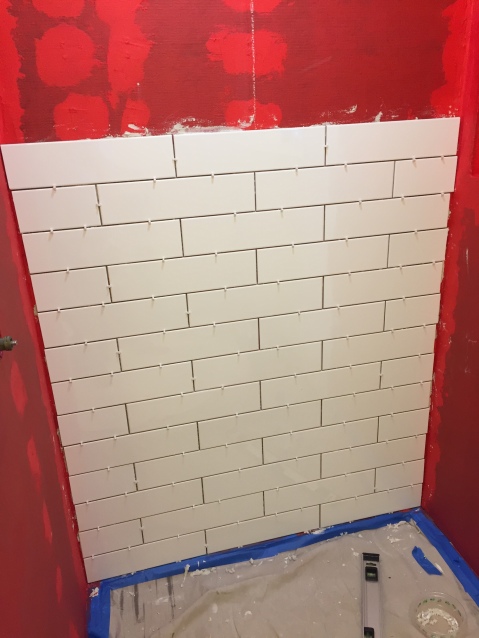
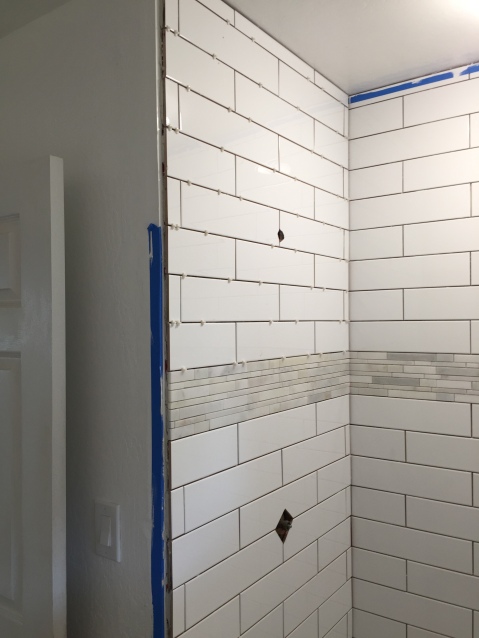
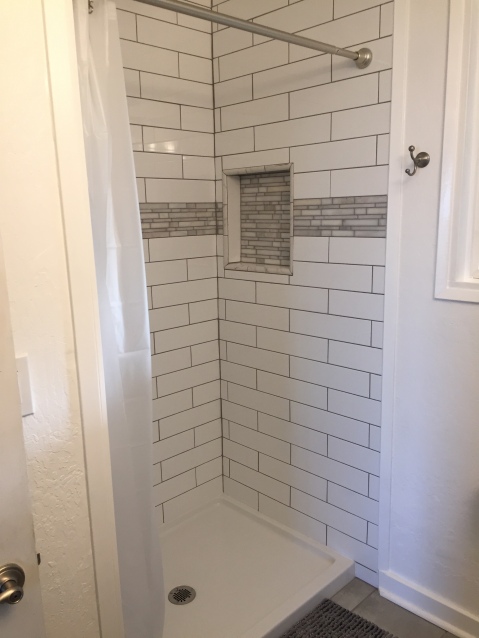
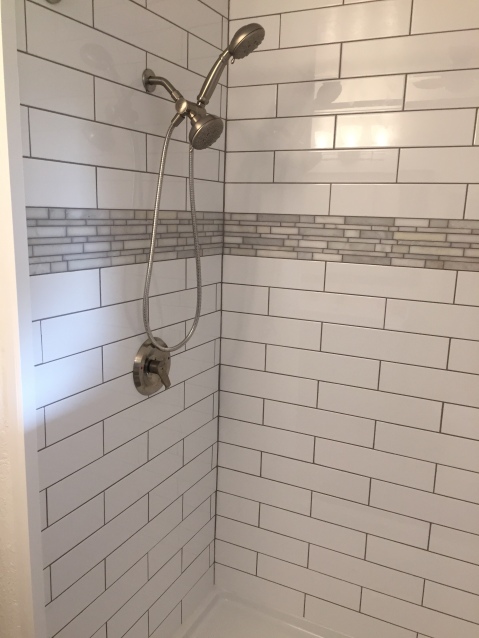
Our next tasks were to install the tile on floor and in the shower. We had tiled floors before but not a shower so we knew we were in for a fabulous learning experience. We went with large grey tiles for the floor to give this small bathroom a larger feel. For the shower we went with 16 x 4 white subway tile and a stone accent strip. We used grey grout to better define the white tiles. The walls were painted with white semi-gloss paint to keep it bright in the small space.
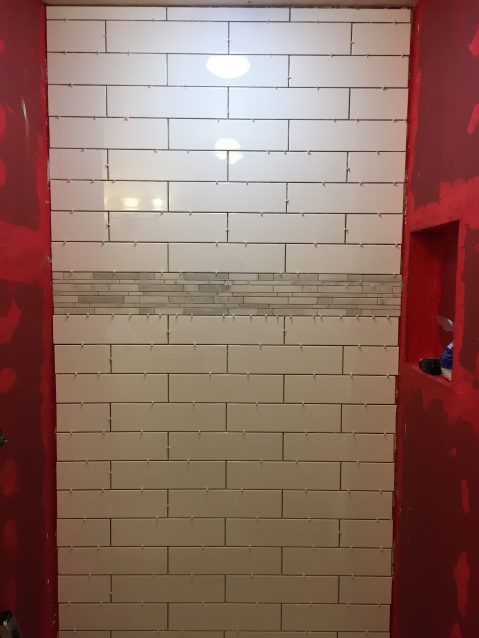
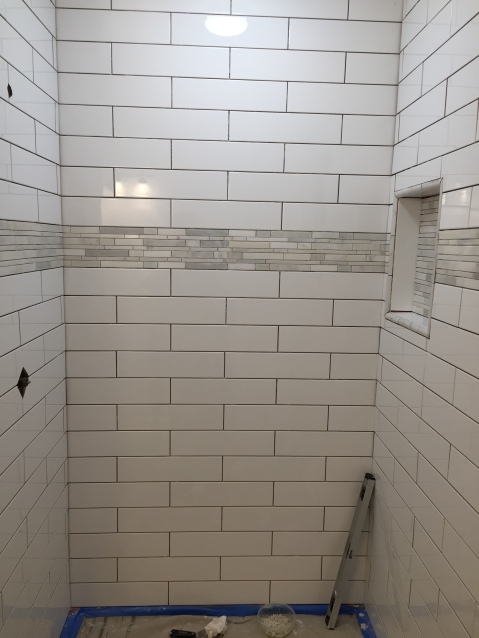
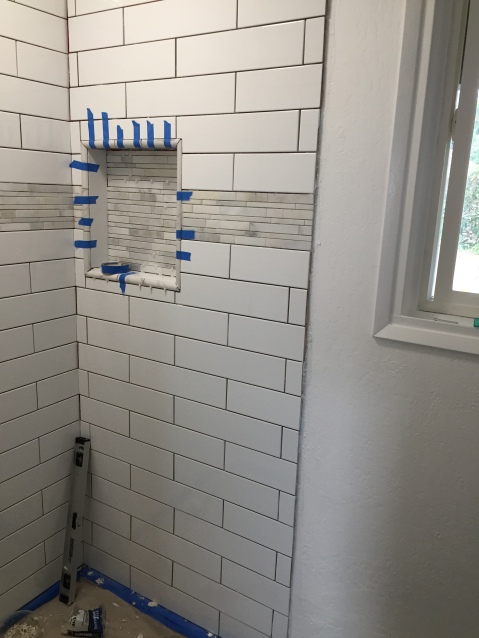
We were worried about getting the insert done, but it turned out to not be as difficult as we thought it would be…

…and we think it turned out pretty well!
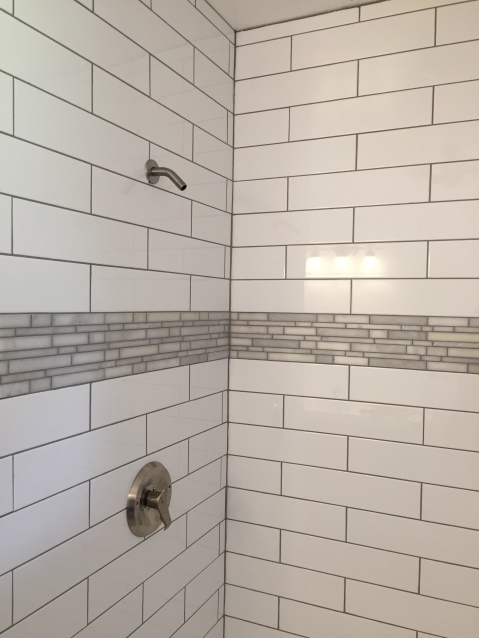
The pictures look good but it actually took us 3 full weekends of tiling to complete the shower. The floor we knocked out in a few hours. Grouting the shower took 3 days to complete even with the pre-mixed grout. But we are first timers for the shower part and we were learning on the job. Our next shower will benefit from the knowledge we picked up on this project.
The Final Product
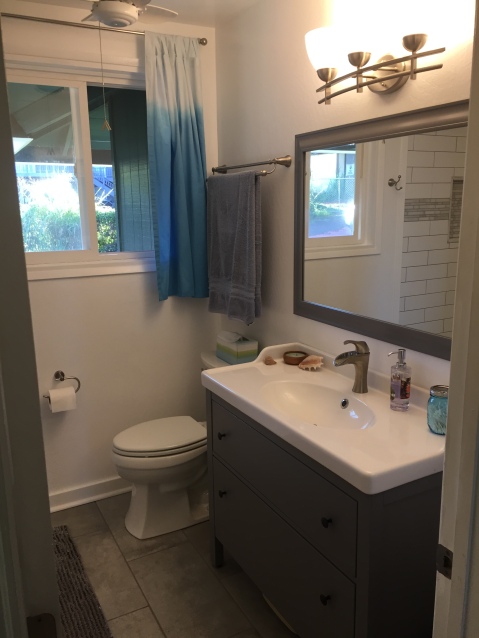
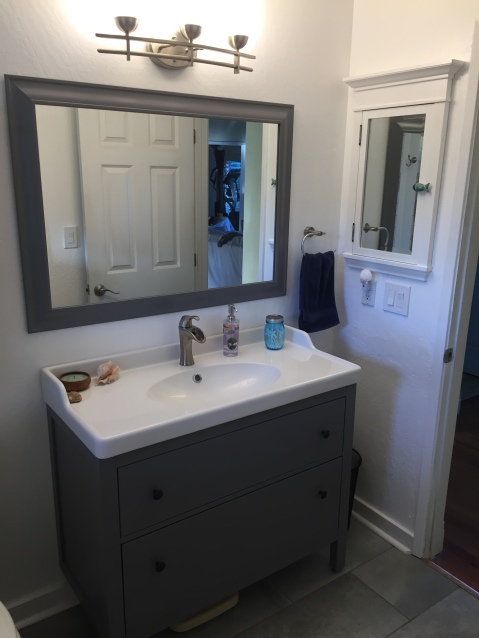
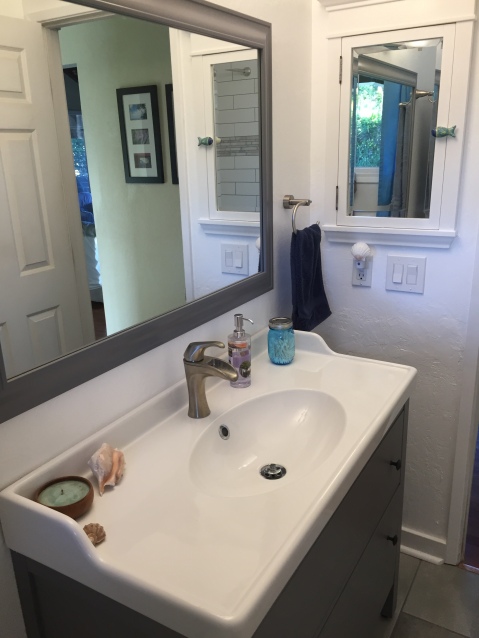
The fun stuff. We had ordered a bathroom sink/cabinet from IKEA. Since IKEA doesn’t ship to Hawaii, we contracted with a firm that specializes in shipping IKEA items to Hawaii. You place your order through them and they ship to the port here on Kauai where you pick it up. The shipping is pretty steep but even with that we were able to get a nicer wood (not particle board!) cabinet and sink for less than buying (a decent) one at Home Depot. We also ordered a ceiling fan appropriate for wet areas from Amazon and installed it over the commode. The LED light fixture was a Costco buy. The mirror we found at Home Depot by accident and it perfectly matched our cabinet (Score!!!!).
We are still going to install a glass enclosure for the shower but we haven’t settled on what we want yet – and we had to wait until we were done tiling to get good measurements before ordering one.
Anyway, here are the photos of the bathroom that I just took a few minutes ago. I hope you like the final product!
The Cost of it all
The final cost of the project to this point is about $3,100. That doesn’t include the glass enclosure which we estimate will be another $700. So an ultimate cost of $3,800 for a full bathroom renovation. Plus about 2 months of our time from start to finish. Everything in this bath down to baseboard, door trim, wall plates and electrical switches were changed except the medicine cabinet, which was repainted and re-used (and a cool little ceramic fish knob added).
Well, that’s it – I hope this was interesting to you. Our next project will probably be the Master Bedroom – although we are hoping to get the living room remodeled shortly as well.
Aloha!!!!!

Looks great! But I have one question. When you open the medicine cabinet does it hit that small towel rack?
Chuck Clingenpeel
Virus-free. http://www.avast.com
On Sat, May 20, 2017 at 10:48 AM, Kauai Thoughts – our journey to Kauai from So Cal wrote:
> akiva96 posted: “Our second renovation project is the guest bathroom. This > is a small, but not tiny, bathroom that is next to the guest bedroom that > we previously updated. We have guests coming to stay with us on May 31 so > we had a limited time to get everything done. And” >
Hi Chuck. Thanks! The medicine cabinet does not hit the towel ring. It only opens so far and there is not any interference.
I was thinking of installing safety shields like we had at Sony but I don’t have any PLCs.
LOL